Pages

Tuesday, November 18, 2014

Broccoli Salad ~ By Valerie


 This summer, we were introduced to this broccoli salad by some new friends that invited us over to their home!  We all enjoyed it very much!  But I especially LOVE this salad!  I even requested it for my birthday meal!  It has so much flavor and texture to it! And it is all fairly healthy things that go in to it!   So I knew I needed to record the recipe here, and share it with you all!  Enjoy! 


Broccoli Salad
    5 C. fresh broccoli florets
    1/2 C. raisins or craisins
    1/2 C. sunflower seeds
    1/2 C. cooked bacon
    1/2 C. onion (any variety, but we haven't added these to ours yet)
    1/2 - 1 C. grated cheese
    1 C. frozen peas, thawed (our family isn't a big fan of peas, so we haven't added these) 
Dressing:
    1 C. Mayo
    2 TBS. vinegar (any kind)
    1/2 C. Sugar 

Mix salad ingredients in a large bowl.  In a separate bowl whisk dressing ingredients together.  Add dressing to salad and mix well.  Chill before serving.
 
Source:  Mrs. Langdon's Kitchen 

Monday, October 27, 2014

Baked Garlic Chicken and Glazed Carrots ~ By Victoria

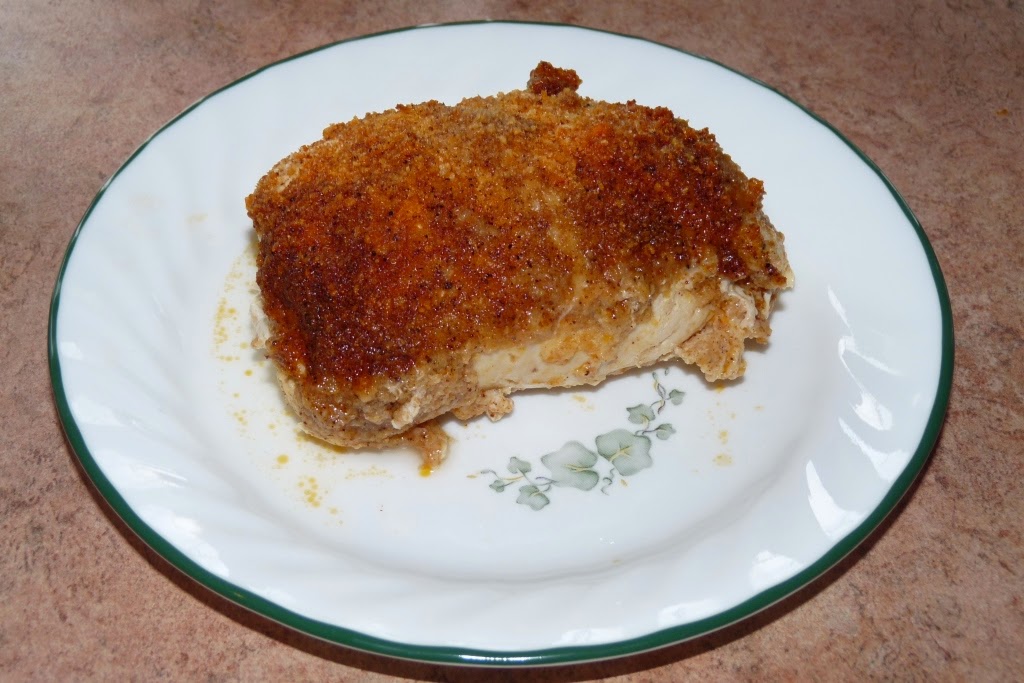
Both of these recipes are definitely favorites of ours! The chicken recipe takes just 5 minutes to put together and the carrots are a nice side dish... although any side would go good with this chicken.  I had to improvise a little with the chicken recipe the night this picture was taken as we didn't have shredded parmesan or bread crumbs.... so I used grated parmesan and crumbled up Ritz crackers for the bread crumbs. :)


Baked Garlic Chicken
 
Ingredients: 6 chicken breasts
1/3 cup California Olive Ranch olive oil
1 tablespoon garlic, crushed
1/2 cup dry bread crumbs
1/2 cup grated Parmesan cheese
1/2 teaspoon dried Italian seasoning
1/3 cup shredded Parmesan cheese
 
Directions:
Preheat oven to 400 degrees. Line a 9x13" baking pan with aluminum foil (for easy clean-up) and lightly spray with non-stick cooking spray. In a small bowl, mix together the olive oil and garlic. In another bowl, combine the bread crumbs, grated Parmesan cheese and the Italian seasoning.
Dip each chicken breast first in the olive oil and then in the bread crumb mixture. Place breaded chicken on the pan and top with additional shredded Parmesan cheese (optional). Cook chicken for 35-40 minutes (or until chicken is completely cooked and reaches an internal temperature of 165 degrees).


Glazed Carrots
 
Ingredients:
16oz baby carrots
1/3 cup brown sugar
2 T butter
 
Directions:
Combine the carrots and other ingredients in a sauce pan and cook on medium heat until tender, about 10-15 minutes, stirring occasionally.


Tuesday, October 7, 2014

Blueberry Lemon Cream Cheese Coffee Cake ~ By Victoria

Here is a new recipe that got a "thumbs-up" from everybody. :) This coffee cake seems like it would be a *perfect* spring dessert!  I actually saw a piece of  "Blueberry Lemon Cream Cheese Coffee Cake" at the WA State Fair last month and it looked soooooo good. So,  I took a mental note of it and decided to try it out. :)

Ingredients
  • 2¼ cups flour
  • ¾ cup sugar
  • ¾ cup butter
  • ½ teaspoon baking powder
  • ½ teaspoon baking soda
  • ¼ teaspoon salt
  • ¾ cup sour cream
  • 1 egg
  • 8 ounces softened cream cheese
  • ¼ cup sugar
  • 1 egg
  • ½ cup homemade or store-bought blueberry jam
  • Zest and juice of one lemon
Directions:
  1. Preheat the oven to 350F and lightly grease and flour a 9 by 13″ baking tin.
  2. In a large bowl combine flour, sugar, and butter with a pastry cutter to make a crumbly mixture.
  3. Remove 1 cup of the crumbs for topping, set aside.
  4. Add with baking powder, baking soda, salt, sour cream, and 1 egg to the remaining mixture in the large bowl. Combine until smooth and spread evenly in the prepared baking pan.
  5. Beat softened cream cheese, ¼ cup sugar, zest and juice of lemon and 1 egg until smooth.
  6. Pour over the batter in the pan and spread in an even layer.
  7. Spoon the jam over the cream cheese layer and swirl with a knife to make a marbled effect.
  8. Sprinkle the reserved crumbs on top.
  9. Bake in a preheated oven for 45-55 minutes until a knife inserted comes out clean.
Source:  http://bakerstreet.tv/2012/09/blueberry-lemon-cream-cheese-coffee-cake/

Friday, September 26, 2014

Pumkin Butter ~ By Victoria

Nothing says fall like pumpkin butter!  You could use pumpkin butter on biscuits, rolls, toast, scones or even in pumpkin butter pancakes. :)  I *highly* recommend using it on top of a bagel with cream cheese.  Now *that* is absolutely heavenly!


Ingredients
  • 1 15 oz can Pumpkin
  • 1 Cup Sugar
  • 1 Cup Brown Sugar
  • 1 tsp Cinnamon
  • 1/4 tsp Nutmeg
  • 1/2 tsp Ginger
  • 1/8 tsp Ground Cloves
  • 4 1/2 Pint Sized Canning Jars and Lids
Instructions
  1. Combine all ingredients in a slow cooker and mix well.
  2. Cover and cook on high for 3 hours- stirring occasionally to prevent scorching.
  3. To Can* (see note below): Fill jars 3/4 of the way full and secure canning lids. Place jars in a pot with a shallow boiling water bath for 40 minutes (or 20 minutes in a pressure canner with 10 lbs of pressure)

Monday, September 1, 2014

Chocolate Zucchini Bread ~ By Victoria

This bread it perfect for an afternoon snack, breakfast, or dessert!
It is soooo moist! 
And having zucchini in it makes you feel like you're eating a healthy food!
Well, sorta. :)
 
Ingredients:
2 (1 ounce) squares unsweetened
chocolate
3 eggs
2 cups white sugar
*1 cup sour cream
1 cup vegetable oil
2 cups grated zucchini
1 teaspoon vanilla extract
2 cups all-purpose flour
1 teaspoon baking soda
1 teaspoon salt
1 teaspoon ground cinnamon
3/4 cup semisweet chocolate chips
Directions:
1.Preheat oven to 350 degrees F (175 degrees C). Lightly grease two 9x5 inch loaf pans. In a microwave-safe bowl, microwave chocolate until melted. Stir occasionally until chocolate is smooth.
2.In a large bowl, combine eggs, sugar, oil, grated zucchini, vanilla,  sour cream and chocolate; beat well. Stir in the flour baking soda, salt and cinnamon. Fold in the chocolate chips. Pour batter into prepared loaf pans.
3.Bake in preheated oven for 60 to 70 minutes, or until a toothpick inserted into the center of a loaf comes out clean.

Source: All Recipes
http://allrecipes.com/Recipe-Tools/Print/Recipe.aspx?recipeID=17289&origin=detail&servings=20&metric=false

* The recipe we use has the exact same direction and ingredients, but a cup of sour cream was added.

Wednesday, August 27, 2014

Fried Chicken ~ By Victoria

Fried Chicken
 
I hate to even say it, but this was the very first time any of us girls made fried chicken! How have we lived all these years without it!? This is the first (and so far only) recipe I have tried, but wow, was it a hit! Everybody loved it! When we find a recipe that every Bowes member likes, we know it's a keeper and needs to go on the blog! :)  

Ingredients


* 1 chicken (about 3 pounds), cut into 8 pieces
1 1/2 teaspoons salt
1 1/2 cups flour
1 teaspoon freshly ground black pepper
1/2 teaspoon cayenne pepper
1 cup buttermilk
vegetable oil


Directions

  1. Combine the salt, flour, black pepper, and cayenne in a large, shallow bowl. Dredge the chicken in the flour mixture, shaking off the excess. Set aside for about 15 minutes. Pour the buttermilk into a second shallow bowl. Dip the chicken in the buttermilk, then again in the flour mixture.
  2. In a heavy-bottomed Dutch oven (preferably cast iron), heat about 4 inches of vegetable oil over medium heat until the temperature registers 360° F on a deep-fry thermometer.
  3. Carefully place the chicken in the oil, using tongs. (Add the pieces slowly, so that the temperature does not drop, and work in batches to avoid overcrowding.) Fry the chicken until golden brown, turning once, 10 to 20 minutes, depending on the size of the pieces. Check for doneness by piercing the meat; the juices should run clear.
  4. Drain the chicken on paper towels set on a wire rack. If desired, the cooked chicken can be kept warm in an oven set on low.
* Since I didn't have a whole chicken on hand, I used chicken breasts. I cut each one in half before dredging.

Source: Real Simple Food
http://www.realsimple.com/food-recipes/browse-all-recipes/easy-fried-chicken-10000001038795/index.html

Thursday, July 24, 2014

Strawberry Cream Crepes

This very rich and sweet breakfast recipe has been a long-time family favorite.  A big giant batch is normally cooked in the Bowes house on special occasions such as birthdays, holidays, and sometimes even for visiting friends and family.  It could easily double as dessert, too!

Batter:
1 1/2 C milk
3 eggs
2TB melted butter
1/2 tsp. lemon extract
1 1/4 C flour
2 TB sugar
1/8 tsp. salt 
Combine dry and wet ingredients separately and then mix them together.  Pour about a 2/3 c of batter onto a heated, greased, frying pan and cook until the top is "dry."  (Set your burner on a medium-high setting.)  Layer crepes between wax paper or fill and serve immediately because they will all stick together!
 
Filling:
1 C. whipping cream, whipped (fold into the following ingredients)
 8oz softened cream cheese
2 C. powdered sugar
1 tps. vanilla

Topping:
Berry sauce of any sort!  I like to mix about 3c fresh raspberries and blueberries with 1/4 c sugar, bring to a boil for 5 minutes.  Ready to serve!

You can also add a dollop of whipped cream to the top, if you feel like over-indulging :-)


Wednesday, July 16, 2014

Chocolate Chip Cookies ~ By Victoria


 Let me introduce you to the Bowes Family's BEST chocolate chip cookie recipe!! We LOVE these cookies! We Boweses are quite picky when it comes to CC cookies... and finding a recipe that we all like can be very challenging. But here it is. This recipe has been in the family for as long as I can remember and no other recipe has even come close to winning all of our favor (and believe me, we have tried a LOT of other recipes!). These cookies are soft, chewy and fluffy and do not flatten out like most other CC cookies. They do have Crisco instead of butter, but I believe that is one reason why they are so good as the recipes we use with butter always completely flatten out.

We like to use half mini c. chips and half regular c. chips or half white c. chips and half regular in this recipe. :-)
 

Chocolate Chip Cookies
3/4 cup butter Crisco
1 1/4 cup firmly packed brown sugar
2 T. Milk
1 T. Vanilla
1 Egg
2 cups flour
1 tsp. salt
3/4 tsp. baking soda
1 1/2 cups chocolate chips
 
Directions:
Preheat oven to 375
Cream Crisco and brown sugar. Add milk, egg and vanilla.
Combine flour, salt and baking soda. Add to creamed mixture and then (by hand) stir in chocolate chips.  
Bake for 8-10 minutes.


Thursday, July 3, 2014

Funfetti Cookies ~ by Caroline

Perfect for celebrating the 4th of July, or any special occasion, these cookies are very festive and delicious!!! They are fun to make and serve!!! 
 
Ingredients
  • 2 sticks softened butter
  • 1 1/4 cup sugar
  • 2 tsp vanilla
  • 1 tsp almond extract
  • 1 egg
  • 2 1/2 cup flour
  • 1/4 cup cornstarch
  • 3/4 tsp baking soda
  • 1/2 tsp salt
  • 1/2 cup rainbow jimmie sprinkles (the long thin sprinkles))
  • 2 tbsp rainbow perils (tiny balls sprinkles)
Instructions

Preheat the oven to 375º.
Cream the butter and sugar in your stand mixer (or hand mixer) for about 2 minutes (until fluffy). Add the vanilla, almond, and egg. Beat until well combined.
In a separate bowl, sift in the flour, cornstarch, soda, and salt. SLOWLY add the flour mixture to the butter mixture, and continue on low speed until it’s all added and combined. Mix in the sprinkles (don’t overmix or the sprinkles will start to bleed into the dough).
Using an ice cream scoop, scoop cookie dough onto cookie sheets, about 1 1/2 inches apart (fits 8 cookies per sheet). Bake for about 15 minutes.
*Only bake until they very slightly start to turn light golden brown just on the edges. You don’t want them to totally turn golden or they’ll be crisp cookies. Check then around 10 minutes, then 12, and so on.
Cool on a wire rack.
Store in an airtight container up to 4 days.
 
Source: Tasty Kitchen.Com Blog
http://tastykitchen.com/blog/2012/05/funfetti-cookies/

Tuesday, July 1, 2014

Strawberry Cheesecake Cupcakes ~ by Caroline

First off, we give all the credit for these amazing cupcakes/muffins to their creator at http://granolagirlbakes.com/   She came up with the recipe, and she also has some awesome pictures to go along with it!   We just recently stumbled across her site, and at the time, these were what were posted on her home page.  The only thing we didn't do was frost them as they are wonderful and just to our liking, even without the extra sweetness.

Yields 24 cupcakes
Cake Ingredients
  • 1 1/2 sticks butter{softened}
  • 4 oz cream cheese{softened}
  • 1 1/2 cups sugar
  • 3 eggs
  • 1 1/2 tsp pure vanilla extract
  • 1/2 tsp almond extract{optional}
  • 1 1/2 cups white flour
  • 1 tsp salt
  • 1/2 pint fresh strawberries diced
Icing
  • 1 stick butter{softened}
  • 6 oz cream cheese{softened}
  • 3 cups powder sugar
  • 1 1/2 tsp pure vanilla extract
  • 1/2 tsp almond extract{optional}
  • 1/2 tsp salt
Topping
  • 1/2 cup graham cracker crumbs
Directions
  1. Preheat oven to 350° Fahrenheit. Line muffin tins with paper!
  2. Cream butter, 4 oz cream cheese, and sugar in an electric mixer on high-speed for 3 minutes.
  3. Add eggs one at a time mixing well after each egg. Stir in Vanilla & almond extract and scrape sides.
  4. Turn mixer on low and slowly add flour 1/2 cup at a time and salt until completely combined!
  5. With a rubber spatula, gentle fold in strawberries. Place 1/4 cup batter in each muffin cup. Bake for 14-17 minutes or until golden and an inserted toothpick comes out clean!
  6. Allow to completely cool while you make the icing!
For the icing:
  1. Place all ingredients in a large mixing bowl and beat on high for 3 minutes. Scrape sides and bottom of bowl and mix for another minute!
  2. Pipe onto cooled cupcakes and top with graham cracker crumbs!
  3. Enjoy!!

Saturday, June 28, 2014

Chicken Alfredo ~by Lydia

This has to be one of our all-time favorite dishes.  It's definitely not a recipe designed for the low-fat dieters. Although, it is my humble opinion that low fat diets are not healthy for the hard-working young farmer anyway.  That is my excuse for whipping up this recipe every so-often, though it is (argumentatively) a poor one! :0)

 Although this makes enough for the two of us plus enough leftover to make a couple more meals, I would suggest you double the recipe for a bigger family. :0)

8 oz Pasta (Fettuccine is most popular.)
4 C Cooked chicken pieces (Use leftover bbqed chicken, boiled chicken, whatever your preference!)
8oz Cream cheese
6 TB Butter
1 Carton mushrooms (optional)
1/2 C Milk
1 C. Sour cream
1 TB Garlic powder
1TB Onion powder
2 tsp Ranch dressing mix (optional)
1TB Oregano
2tsp Basil
1/3 c. Parmesan cheese (optional)
Salt and pepper to taste
2tsp cornstarch dissolved in 2tsp water (optional)

Directions

  1. Bring a large pot of lightly salted water to a boil. Add pasta, and cook for 8 to 10 minutes, or until al dente; drain.
  2. While pasta is cooking, melt cream cheese and butter in a skillet over low heat. Stir until smooth. Stir in milk, sour cream, seasonings, and cheese.  Simmer for 3 minutes, or until thickened, stirring constantly.  Add cornstarch to thicken, if you like it nice and thick like we do :-)
  3. Mix in chicken (and add some sun-dried tomatoes, if you like those!)
Source: Allrecipes.com

Thursday, June 26, 2014

Guest Post: How to toast toast ~ by a professional

The lovely ladies of this blog seem to be in need of a little assistance. Though their posts on delectable delicacies of all sorts are all well and good, they lack the certain flare a true professional literally brings to the table. It takes a special person to elevate the good to the fantastic, the run-of-the-mill to the extraordinary, the Twinkie to the decadent cake. It takes a master chef to turn the eyes of the general public and captivate them with wonders of the edible kind. Only a true professional can offer such miracles to a blog.

And I am happy to oblige.

Today we shall learn of a secret to golden perfection. Namely, I will strive to enlighten your uninformed brains with a true marvel: I will teach you how to toast toast. I assure you, your minds will be blown.

So let's get started.

First you will want to know the necessary ingredients, I suppose. Simple. Bread. And perhaps a dollop of butter or jam--or both. You may live in one of those annoying families who sometimes stores all their bread in the freezer. Such a one is I. But no problem, let me quickly add a note for those of you in this situation.

If you find yourself ravenously hungry for toast but with a frozen lump of bread in your hands--all because your family wants to add a couple weeks of life to the bread or whatever by storing it in the freezer--you may find that the slices are frozen together. This can be quite frustrating, as you only need a couple of slices of bread . . . but will have to unthaw the whole loaf in the microwave to get them. Keep your cool, for I have found a way to bypass this added timewaster. Simply, hurl the frozen loaf on the ground.

Amidst the shards of frozen bread, you should be able to find a couple slices that remain wholly intact. Pick them up and brush them off if necessary. We can now proceed with the normal steps.

You will need to locate the toaster next. I would suggest searching everywhere but the obvious places for this appliance, and you should find it promptly. Plop the toaster down on your counter; then, insert your slices of bread into the desired slots. Amazingly, all it takes afterwards is a push of a lever--and your journey to golden perfection is begun.

(FYI, if a reddish glow is not emanating from the toaster slots, now would be a good time to remember to plug in your toaster)

Next comes the waiting. The long, hard waiting. Perfection is never without a price, and "the price" in this case is a dauntless vigil over that white box that seems to be doing nothing to your bread. Do not take your eyes off the thing. Trust me, I have learned the hard way. Like a guard over some unspeakable treasure, you cannot relax your vigil, or golden perfection will become blackened disaster.

What's that, your little brother just came in from riding his bike with a crimson scrape on his knee? Ignore him. Time heals all wounds. The phone is ringing? Must not be important. Da-dink!  Oh look, an e-mail came through on your laptop. No, even better, it's a new blog comment!!!

A loud screeching noise pierces your ears five minutes later, and you raise your head from your laptop and the LOL you were in the middle of typing in reply to realize the smoke wafting from your toaster. Ah, it happens to the best of us, even the professionals. The smoke alarm is unfailingly good at reminding us of that.

But now comes the moment that separates the professionals from the amateurs. You see, we professionals always have a backup plan. If there is any discernible piece of bread left in the toaster, carefully remove it (Caution: it might be hot or possibly still on fire!!!). Using a butter knife, set to scraping the black scrap of food over and over again on both sides. A few minutes later, you should have a much slimmer piece of bread that vaguely reminds you of the golden perfect in the below picture.


 Now all you have to do is spread some butter and jam before enjoying this treat! I would suggest you spread the sweet stuff liberally--the thicker the jam, the less of the burned-bread aftertaste.

And there you have it! Words of wisdom from an expert. No need to thank me (your wide-eyed wonder is enough). This is just what I do.

Tune in next time for my next brilliant post: How to make cold cereal!

P.S. It sure is fun to hijack your sisters' blog!

Wednesday, June 25, 2014

Pumpkin Chip Cupcakes ~ by Victoria

Even though, at the time of this posting, it is the first few official days of summer, we LOVE to bake with pumpkin year round!!  And chocolate goes with everything, right? These cupcakes/muffins are delicious, fairly nutritious, and are very quick to make!!  They have been some of our favorites for years! 
 
We usually do not frost them, as we like them just the way they are! ;-) 
 
15 ServingsPrep: 20 min. Bake: 20 min. + cooling

Ingredients

  • 1 cup all-purpose flour
  • 3/4 cup whole wheat flour
  • 1 teaspoon baking powder
  • 1 teaspoon baking soda
  • 1/2 teaspoon salt
  • 1/2 teaspoon ground cinnamon
  • 1/4 teaspoon ground nutmeg
  • 2 eggs, lightly beaten
  • 1 cup canned pumpkin
  • 1/2 cup canola oil
  • 1/2 cup honey
  • 1/3 cup water
  • 1/2 cup chopped walnuts or pecans (Your preference; we usually omit them.)
  • 1 cup miniature chocolate chips
  • FROSTING:
  • 1 package (8 ounces) cream cheese, softened
  • 1/4 cup butter, softened
  • 1 teaspoon vanilla extract
  • 2 cups confectioners' sugar

Directions

  • In a large bowl, combine the first seven ingredients. Combine the eggs, pumpkin, oil, honey and water. Stir into dry ingredients just until combined; fold in walnuts and chocolate chips.
  • Fill greased or foil-lined muffin cups three-fourths full. Bake at350° for 20-25 minutes or until a toothpick inserted near the center comes out clean. Cool for 10 minutes before removing from pans to wire racks to cool completely.
  • For frosting, in a small bowl, beat the cream cheese, butter and vanilla until fluffy. Gradually beat in confectioners' sugar until smooth. Frost cupcakes.
  • Yield: 15 cupcakes.
Source:  Old Taste of Home magazine clipping

Tuesday, June 24, 2014

Oatmeal Bread ~ by Caroline

                                                                                This recipe comes from our beloved Grandma Jerke, who is now in heaven with Jesus!  She also shared it with our church family in the Shoestring Valley Community Church cookbook, and we are soooo glad she did! 

It is such a moist bread, and makes for amazing sandwiches or toast for breakfast. OR you can make it into rolls for dinner!  Yum!!!  


Makes 2 loaves

1c. quick oatmeal
2 c. boiling water
3 Tbsp. butter
2/3 cup brown sugar
2 pkg. yeast, dissolved in 1/2 cup warm water with 1 Tbsp. sugar
1 1/2 tsp. salt
5 c. flour

Mix together oatmeal, water and butter and cool to lukewarm.  Add brown sugar, yeast mixture and salt.  Mix in flour, kneading and letting it rise.  Shape into 2 loaves or into rolls.  Let rise for 1/2 hour.  Bake at 350 degrees for 20 to 25 minutes.

Monday, June 23, 2014

Baked Ziti ~ By Valerie

For some reason, our family hasn't been real big Italian food lovers.  However, this has been one Italian dish that we all seem to like a lot.   It resembles lasagna in taste, but seems easier to make!

6-8 ServingsPrep: 20 min. Bake: 45 min. + standing

Ingredients

  • 12 ounces uncooked ziti or small tube pasta
  • 2 pounds ground turkey or beef
  • 1 jar (28 ounces) spaghetti sauce (We usually add extra sauce which keeps it from being on the dry side.)
  • 2 eggs, beaten
  • 1 carton (15 ounces) ricotta cheese
  • 2-1/2 cups (10 ounces) shredded mozzarella cheese, divided
  • 1/2 cup grated Parmesan cheese

Directions

  • Cook pasta according to package directions. Meanwhile, in a large
  • skillet, cook beef over medium heat until no longer pink; drain.
  • Stir in spaghetti sauce.
  • In a large bowl, combine the eggs, ricotta cheese, 1-1/2 cups
  • mozzarella cheese and the Parmesan cheese. Drain pasta; add to
  • cheese mixture and stir until blended. 
  • Spoon a third of the meat sauce into a greased 13-in. x 9-in. baking
  • dish; top with half of the pasta mixture. Repeat layers. Top with
  • remaining meat sauce.
  • Cover and bake at 350° for 40 minutes or until a thermometer
  • reads 160°. Uncover; sprinkle with remaining mozzarella cheese.
  • Bake 5-10 minutes longer or until cheese is melted. Let stand for 15
  • minutes before serving.
  • Yield: 6-8 servings.
Source:  Old Taste of Home magazine clipping

Thursday, June 19, 2014

Chai Tea Latte~ By Lydia

 The credit goes to Valerie for telling me about this wonderful drink.  I've missed out all these years!  Make the tea concentrate any time and store in the fridge for up to a week.  Mix it 1:1 with hot milk.  To make the lovely froth, throw the hot milk in the blender before adding tea.

Homemade Chai Tea Concentrate

  • 4 cups of water
  • 4-6 Chai tea bags, depending on how strong you like it.
  • 2 Tbsp honey
  • 1 tsp vanilla
Directions
• Place water and tea bags in a saucepan over medium heat and bring to a low boil. Turn heat down to low/medium-low and simmer for 10 minutes. Remove tea bags and carefully squeeze them into the pan to get all the tea out.
• Stir in honey and vanilla while tea is still hot so the honey dissolves. Pour chai concentrate in a glass mason jar and store in the fridge. I’ve found it to keep well for at least 7-10 days, but it’s usually gone before that!
Sometimes I like to add a little vanilla syrup (the kind they use in espressos) to make mine just a little sweeter. :-)

Wednesday, June 18, 2014

Mexican Tea Cookies ~ by Valerie

The other day, Mommy was in "need" ;-) of some comfort food,
and one of our family's favorite Christmas recipes came to her mind! 
Since we happened to  have pecans on hand,
she began "dreaming of a white Christmas" . . . . cookie!
This recipe has been in Mommy's family since she was a child,
and so it is one of Aunt Kelley's favorite Christmas cookies, as well! ;-)
The original origin of the recipe is unknown,
but of course, there are many different names
and recipes for this particular type of cookie out there.
We just happen to think this one is the BEST!


1 cup butter
1/4 -1/2 cup granulated sugar
1/2 tsp. salt
1 tsp. almond flavor
2 teaspoons vanilla
2 cups flour
1-2 cups chopped pecans
Powdered sugar
 
Blend with a mixer butter and sugar together.  Add almond and vanilla flavors.  Combine salt and flour together, then add to creamed mixture.  Stir in nuts. 
 
Roll into small balls and place on cookie sheet. 
Bake in 350 degree oven for approximately 8 minutes.
When cool, roll in powdered sugar.  
 

Tuesday, June 17, 2014

Chicken Acapulco ~ By Victoria

Flattened chicken pieces that are rolled-up
with green chilies and Monterey Jack cheese in the middle!

This has been another long-time favorite in our family.  It is a little more time consuming than I prefer, ;-) but it is worth the extra work!  The chicken turns out very flavorful and juicy!  The original recipe includes a tomato sauce, but we've never used it.  It has great flavor and moistness without anything else added to it!  Enjoy!

8 chicken breast halves, boned and skinned
1 can diced green chilies divided into 8 portions (we actually use 2 cans!)
1/4 pound Monterey Jack cheese, cut into 8 strips (or you can use shredded as well)
1/2 cup fine dry bread crumbs
1/4 cup grated Parmesan cheese
1 Tablespoon chili powder
1/2 teaspoon salt
1/4 teaspoon cumin
1/4 teaspoon pepper
6 Tablespoons butter, melted

  • Pound chicken pieces to 1/4 inch thickness.
  • Place chilies and Jack cheese strip in center of each chicken piece.  Roll up and tuck ends under.
  • Combine bread crumbs, Parmesan cheese, chili powder, salt, cumin, and pepper.
  • Dip each stuffed chicken breast in shallow bowl of 6 Tablespoons melted butter.  Roll in crumb mixture.
  • Place chicken seam side down in oblong baking dish.  Drizzle with a little melted butter.
  • Cover and chill for 4 hours or overnight.
  • Bake uncovered at 400 degrees for 20 minutes or until done (We cut the center one open to check for any pinkness.) 
  • Serves 8
Source:  Desert Treasures cookbook

Thursday, June 12, 2014

Sour Cream Rhubarb Cupcakes


    These were FANTASTIC!  I made a few changes, but did not stray far from the original recipe.  I wanted half apple and half rhubarb, so threw in some chopped apple along with the prescribed amount of rhubarb in the recipe.

THEN.  I stumbled across the most perfect butter-cream frosting in history.  Absolutely un-healthy, fattening, artery-clogging...etc.  But I was looking for something really firm and buttery, and this recipe fit the bill.  Nothing wrong with a small splurge for special occasions, in my opinion :-) I'll post the frosting recipe later.

 Sour Cream Rhubarb Cupcakes
Makes 12-16 cupcakes
Ingredients
1 ¼ cups all purpose flour( I used half whole-wheat)
¾ cup  granulated sugar
1 ½ tsp baking powder
¼ tsp salt
1 stick softened butter
2 medium eggs
½ cup sour cream
1tsp vanilla extract
3/4 cup rhubarb, trimmed and chopped 
3/4 cup pealed apple chunks
Instructions
1. Preheat oven to 350F. Prepare a baking pan for normal size cupcakes with 12 cupcake liners, or a mini cupcake pan with 24 liners
2. Mix flour, sugar, baking powder and salt in a large bowl.
3. Add butter, eggs, sour cream and vanilla and beat until smooth. Stir in chopped rhubarb.
4. Divide batter amongst the cupcake liners and bake for 20-23 minutes for normal size cupcake, 18 minutes for medium and 15 minutes for mini. Check doneness with a toothpick before removing from the oven. Let cool.

 Source: Call Me Cupcake

Wednesday, June 11, 2014

Blueberry Bars - By Valerie

 In honor of Father's Day, and our wonderful Daddy who LOVES blueberries,
we decided to post one of our favorite blueberry recipes!
We make these bars often, because they are so delicious, easy and fairly nutritious!  :-)
The original recipe calls for a can of blueberry pie filling,
but we like to make the filling from scratch with frozen Mossyrock blueberries!
~ ~ ~ ~ ~ ~ ~ ~
Recipe Ingredients: (We one and half this recipe so that we can make a 13 X 9 size pan)
1 1/2 cups all-purpose flour
1 1/2 cups quick cooking oatmeal
1 cup firmly packed brown sugar
1 teaspoon ground cinnamon
1/4 teaspoon baking powder
1/4 teaspoon salt
3/4 cup butter, softened
1 (21-ounce) can blueberry pie filling (See recipe below for our homemade recipe.)

Cooking Directions:

  1. Preheat oven to 375°F (190°C).
  2. Mix all ingredients and cut in butter.  Reserve 2 cups of crumb mixture for topping.
  3. Press the remaining mixture into an ungreased 9-inch baking dish. Bake crust for 5 minutes; remove and add blueberry pie filling into the pan. Top with the reserved crumbs. Bake for 25 minutes or until top is crisp. Cool on a wire rack before cutting.
Makes 16 bars.
Source:  CooksRecipes.com

Blueberry filling Recipe (We times this by 8 for a 13 X 9 pan ;-)

1 cup blueberries
2 Tb. sugar
1 tsp. corn starch
1 Tb. lemon juice
2 Tb. water

Put all ingredients in a medium pot.  Bring to a simmer and cook over medium heat 10 minutes or until blueberries are soft and syrupy. 

Monday, June 9, 2014

Poppyseed Bread - By Valerie

This delicious poppyseed bread has to be one of the most moist sweet bread recipes ever!  We just love everything about it: with the wonderful almond flavor; being sweet and super moist; having a flavorful glaze that seeps into the warm bread and a delight to the eyes; being baked in a bundt pan with a dusting of powdered sugar.  (How was that for descriptive adjectives? :) Another very nice thing about this recipe is it is all mixed in one bowl by hand, so no mixer needed!  It is the perfect thing to bring to a spring or summer party and is sure to be a big hit!  This recipe has been a family favorite for a long time and came out of our Desert Treasures cook book.  

3 eggs
1 1/2 cups milk
1 1/8 cups oil
2 1/4 cups sugar
2 tablespoons poppyseeds
1 1/2 teaspoons vanilla
1 1/2 teaspoons almond extract
1 1/2 teaspoons butter extract
3 cups sifted flour, measured after sifting
1 1/2 teaspoons salt
1 1/2 teaspoons baking powder

Glaze
1/4 cup orange juice
3/4 cup sugar
1 1/2 teaspoons vanilla
1 1/2 teaspoons almond extract
1 1/2 teaspoons butter extract

  • Mix eggs, milk, oil and sugar with a fork.
  • Add poppyseeds, vanilla, almond extract and butter extract.
  • Add flour, salt and baking powder.  Beat thoroughly by hand.
  • Grease and flour 2 loaf pans or a bundt pan.  Bake at 350 degrees for 45 minutes or until toothpick comes our clean.  Cool 10 minutes (45 for bundt.)
  • Glaze:
  • Mix glaze ingredients in a small sauce pan.  Heat to dissolve sugar.
  • Pour glaze over warm bread.
  • Serves 10-12.


Monday, June 2, 2014

King Ranch Chicken Casserole ~ by Victoria

  Being from the southwest, our family is very accustomed to,
and really enjoys spicy foods! 
This recipe isn't super spicy,
but you could certainly make it more so!  
There are lots of variations for this recipe on the Internet,
and some of them have a homemade cream sauce in place of the cans of soup.
We would like to try that next time,
as we try to move away from cans and make as much as we can from scratch.
(We included this new recipe at the bottom of this post.)
 
 
 Ingredients
  • 1 onion, chopped  (many recipes also add green bell pepper)
  • 2 tablespoons vegetable oil
  • 2 cups shredded cooked chicken
  • 1 can cream of chicken soup
  • 1 can cream of mushroom soup
  • 4 ounce can diced green chilies
  • 15 ounce can diced tomatoes, drained
  • 1 teaspoon chili powder
  • 1/4 teaspoon salt
  • 1/4 teaspoon garlic powder
  • 1/4 teaspoon pepper
  • 12 - 14 corn tortillas (six inch)
  • 2 cups shredded cheddar cheese
Instructions
  1. Place oil in large skillet. Add onions and saute over medium heat until onions are lightly browned. Add chicken, cream soups, chilies, tomatoes, and all seasonings. Stir and cook over medium heat until bubbly.
  2. Tear tortillas into small pieces. Place half of pieces in 9x13 inch dish. Top with 1/2 of chicken mixture and 1/2 of cheese. Top with remaining tortilla pieces, remaining chicken mixture, and remaining cheese. bake at 350 for thirty minutes, or until bubbly and lightly browned around the edges.
Source:  http://www.southernplate.com/2010/03/adopt-me-texas-king-ranch-casserole.html

Slightly Fancy-Pants King Ranch Chicken Casserole
Ingredients:
1 1/2 pounds of chicken, without skin and bones
4 teaspoons of lime juice
1/4 cup of olive oil
3 cloves of garlic, minced
4 tablespoons of butter
1/2 an onion, diced
1 red bell pepper, diced
1 poblano pepper, diced
1 10oz. can of Ro-Tel tomatoes, drained (or you can use a can of regular diced tomatoes and a 4 oz. can of diced green chilies, or if tomatoes are in season, can use two cups of diced fresh tomatoes with 1/4 cup of diced green chilies, such as a jalapeno)
4 teaspoons ancho chile powder (or chili powder)
1 teaspoon of cumin
1 cup of chicken broth
2 tablespoons of flour
1/2 teaspoon of cayenne pepper
1/2 cup of half and half
1/3 cup of sour cream
1/2 cup of cilantro, chopped
3 cups of grated pepper jack and cheddar
10 corn tortillas
Salt and pepper to taste.


Method:
1. Season the chicken with the lime juice, 2 teaspoons of ancho chile powder and a dash of salt. In a skillet heated on medium, cook the chicken in the olive oil on each side for about 10 minutes.
2. When chicken is done (after about 20 minutes), shred it with two forks and set aside. Taste and see if it needs more salt and pepper. Should yield about 3 cups.
3. Melt the butter in a saucepan on medium, and add the onions, red bell pepper and poblano pepper. Cook for 10 minutes.
4. Add the garlic, flour, cumin, cayenne pepper and 2 teaspoons of ancho chile powder, and cook for 1 minute.
5. Add the chicken broth and cook on low until mixture is thickened, a few minutes. Stir in the half-and-half and Ro-Tel cover the pot, and simmer for about 15 minutes, stirring occasionally.
6. Uncover the pot, and add the sour cream, 2 teaspoons of lime juice and 1/4 cup of cilantro, and add salt and pepper to taste. Turn off heat.
7. Preheat the oven to 350 degrees.
8. Heat up the tortillas (you can do this by adding a bit of oil on an iron skillet and then cooking the tortillas for about 30 seconds on each side).
9. Ladle 1/2 cup of the sauce onto the bottom of an 11 x 7 inch baking pan.
10. Layer half the tortillas along the bottom of the pan (on top of the sauce). To make sure entire pan is evenly covered, you can rip some of the tortillas into strips to fill any gaps.
11. Add half the chicken, half the remaining sauce, half the remaining cilantro and 1 1/2 cups of grated cheese.
12. Repeat the layering, leaving the cheese layer on top.
13. Cook uncovered for 30 minutes or until brown and bubbling. Serves 6-12, depending on how big a portion you distribute. Goes great with sour cream and cilantro on top.

Source:  http://www.homesicktexan.com/2007/10/king-of-casseroles-king-ranch-chicken.html

Friday, May 30, 2014

Granola Bars

These make a great healthy snack and are my go-to recipe for a perfect little early morning "wake-me-up" before heading off to do my morning milking and animal chores.  Combined with a strong cup of tea or coffee they are almost always effective.  The recipe was born of a hodge-podge of similar but not quite perfect recipes found on the internet a couple years ago, plus a few of my own modifications. :-)  So, rather unfortunately, I have no credit to give unto the proper sources! 

2 C. Oatmeal
3/4C. Flour (I love using oat flour for the flavor and texture, but whole wheat also works.)
1/3 C Brown Sugar (can omit if prefered)
1/3 C Flax Seeds
1/3 C Chopped Almonds (or other nuts)
3/4 tsp. Salt
3/4 tsp. Cinnamon
3/4 C. Rasisns
 1/2 C. Dried Apples...yum!

1/2 C. Honey
1 Beaten Egg
1/2 C. Coconut or other oil
2tsp Vanilla

Mix first 8 ingredeients and last 4 ingredients seperately.  Then mix both together.  Spread  in a well-greased 13x9 and bake at 350 for 30-35 minutes.  Don't let them get too brown, they will harden more as they sit.  I like to cut them as soon as I remove them from the oven.

Wednesday, May 28, 2014

Sweet Potato Bread ~ by Victoria

We found this recipe in a Taste of Home magazine years ago,
and have loved it ever since. 
It is easy, delicious, and a little more nutritious with the sweet potatoes in it!

Ingredients

  • 2 packages (1/4 ounce each) active dry yeast
  • 1-3/4 cups warm water (110° to 115°)
  • 1 cup mashed sweet potatoes (without added milk and butter)
  • 1/2 cup plus 1 tablespoon butter, softened, divided
  • 1/2 cup honey
  • 1 egg
  • 2 teaspoons salt
  • 3 cups whole wheat flour
  • 3-1/4 to 3-1/2 cups all-purpose flour

Directions

    In a large bowl, dissolve yeast in warm water. Add the sweet potatoes, 1/2 cup butter, honey, egg, salt and whole wheat flour. Beat until smooth. Stir in enough all-purpose flour to form a soft dough.Turn onto a floured surface; knead until smooth and elastic, about 6-8 minutes. Place in a greased bowl, turning once to grease top. Cover and let rise in a warm place until doubled, about 1 hour. Punch dough down. Turn onto a lightly floured surface; divide in half. Shape into loaves. Place in two greased 9-in. x 5-in. loaf pans Cover and let rise until doubled, about 25 minutes. Bake at 375° for 40-45 minutes or until golden brown (cover loosely with foil if top browns too quickly). Remove from pans to wire racks.
    SourceTaste of Home magazine clipping